Saturday, November 28, 2015

Spotlight: Escalante - Escalante Petrified Forest State Park

Spotlight: Escalante Petrified Forest State Park was established in 1976 to preserve the thousands of the pieces of petrified wood scattered throughout the area. In addition to petrified wood, petrified dinosaur bones have been discovered from the Jurassic period.


Location: Just north of the town of Escalante, UT, the Escalante Petrified Forest State Park is located at 710 North Reservoir Rd.

Cost: Day use fee - $8; Senior Citizens - $4; an annual Utah State Parks pass - $75
- Paddleboards, canoes, and kayaks are available to rent next to the reservoir for about $15/hour.
- The Wide Hollow Campground costs $19/night.

Time: Open 7:00 am - 10:00 pm (summer); 8:00 am - 10:00 pm (winter); allow 1-4 hours

Description: The visitor center of the park displays various pieces of petrified wood, petrified dinosaur bones, ammonite, and shell fossils.
     There are several trails in the park, but the two most popular ones are the 1-mile loop Petrified Forest Trail, and the 3/4 mile loop Sleeping Rainbows Trail. Along these trails, visitors can find plenty of colorful specimens of petrified wood among the juniper bushes and the remains of an ancient lava flow. It is similar to Petrified Forest National Park in Arizona, but I actually thought that this one was better.
     Adjacent to Wide Hollow Campground is the Wide Hollow Reservoir. You can explore the reservoir by boat, canoe, kayak, or paddleboard.


Rating: 3 1/2 stars (out of 5)

Things You Should Know: - The Sleeping Rainbows Trail is a bit rougher than the Petrified Forest Trail.
- There isn't a lot of overhead shade on this hike, so if you go in the summer, make sure you apply plenty of sunscreen and go in the morning or evening hours.

Nearby: Calf Creek Falls, Spooky Gulch, Posey Lake, Mossy Cave & Waterfall (Bryce Canyon NP)

Tuesday, November 24, 2015

Travel Tip #31 - Traveling during the Holidays

     You've probably heard that the busiest travel day of the year is the day before Thanksgiving. It turns out that that isn't completely true - at least as far as airports are concerned. In the past, it probably has been the busiest travel day of the year in several years - giving rise to the refrain. Of course, that may be the reason why it no longer is. Some school districts have gone on modified calendars in which the students get the whole week of Thanksgiving off, allowing families to leave for the full week without worrying about their kids falling behind. Others leave on Tuesday to avoid the Wednesday rush. Still others have simply decided to avoid airports on that day. In any case, although Wednesday remains one of the busiest travel days of the year, recent data from airlines shows that the busiest travel days currently are weekends during summer break (particularly Fridays) and the Sunday after Thanksgiving.
     The number of people driving on Wednesday is a bit harder to gauge; and if the stats were combined, the week of Thanksgiving is almost assuredly the busiest travel week of the year (in the U.S.), followed closely by the week of Christmas. With that in mind, here are a couple of ideas on how to make traveling during the Holidays a little less stressful.
     1) Plan ahead - If you are traveling by air, you can save a lot of money by buying your tickets several months ahead of time. If traveling by another route, planning ahead gives you a chance to research and weigh your options. Also, by packing ahead, you avoid the stress of last minute packing.
     2) Look at your options - Maybe you always travel the same way for your holiday vacation. If your current mode of travel is stressful, you might want to consider other options - including taking the train or traveling by bus.
     3) Travel light - If you only bring the essentials, you can save time and money. More and more airlines are charging passengers per bag. Also, if you are able to pack your belongings in carry-on bags, you can avoid the dreaded delays of luggage claim (and the disaster of lost luggage). If you have lots of packages, it might be cheaper to ship them ahead of time. Even if you are traveling by car, traveling light improves your average miles/gallon.
     4) Plan for weather delays - Even the best laid travel plans can be torpedoed by weather issues. This is particularly true during the holiday season. If you are driving, keep an eye on the forecasts and be prepared to alter your plans if necessary. If you are flying, just assume that there are going to be delays and plan accordingly.
     5) Avoid heavy traffic - By planning ahead, you can avoid heavy congestion. Some people try to travel the same time every year, and run into the same problems every time. For example, when we travel from Utah to visit relatives in southern California, we've discovered that the stretch of I-15 between San Bernadino and Las Vegas can resemble a parking lot - particularly on evenings at the beginning or the end of a holiday weekend. To avoid this, we try to travel that stretch early in the morning, when most travelers are sleeping in. That usually means traveling halfway on the way down, but with some advance planning, we can usually make that work.
     Whatever your travel plans are this year, plan ahead and be safe!
     

Saturday, November 21, 2015

Spotlight: Escalante - Lower Calf Creek Falls

Spotlight: Grand Staircase-Escalante National Monument covers the last section of the continental United States to be officially explored and mapped. It is also the first National Monument managed by the Bureau of Land Management (BLM) instead of the National Park Service. It is nearly double the size of the combined acreage Utah's five more popular and accessible national parks. The monument is divided into three distinct geographical regions: the cliffs of Grand Staircase, the Kaiparowits Plateau, and the Escalante Canyons.
     Located on the northern borders of the monument, waterfall enthusiasts will discover Lower Calf Creek Falls. As the name implies, there is also an Upper Calf Creek Falls, but we didn't have time to do both. The area was named after its use as a natural pen for calves in the late 1800's.

Location: Lower Calf Creek Falls are located in Grand Staircase-Escalante National Monument, just off of Highway 12, about 11 miles south of Boulder and 16 miles east of Escalante.

Cost: There is a $5 parking fee for the campground parking lot. Camp sites cost $15/night.

Time: 3-5 hours

Description: The trailhead to Lower Calf Creek Falls is located on the north side of the Calf Creek Campground on Highway 12. The 3-mile trail (one way) is relatively flat, but because it crosses several extensive sandy patches, it is rated moderately difficult. The trail follows the stream through beautiful Navajo sandstone cliffs among interesting rock formations, including some natural windows. About 1 1/2 miles up the trail, you can spot some ancient granaries as well as some Native American pictograph panels dating to about 1200 AD. There are also a few beaver ponds along the route.

pictographs

     You can hear the falls before you see them. Lower Calf Creek Falls plunge 126 feet into a deep swimming hole that is the center point of this gorgeous desert oasis. The colorful algae behind the falls adds a unique contrast to the sandstone cliffs. The weather is nicest in the spring and fall, but the water is usually too cold to swim in except during the summer months.


Too cold to swim, so our daughters splash through the water hole
Rating: 4 1/2 stars (out of 5)

Things You Should Know: - The best time to photograph Lower Calf Creek Falls is in the morning.
- You might want to wear a swimsuit under your hiking clothes if the weather is warm. If you are visiting the Falls in the summer, it would we wise to get an early start to avoid the desert heat. Also, make sure you bring plenty of drinking water.
- The canyon used to be inhabited by Native Americans from the Freemont and Anasazi tribes. You can pick up an informative trail guide at the trailhead.
-  The trailhead for Upper Calf Creek Falls is further north off Highway 12. It is only 2.2 miles round trip, but the trail is graded strenuous. The Upper Falls are 88 feet tall.
- Backcountry hikers are required to obtain permits for overnight hikes at the Escalante Interagency Visitor Center.

Nearby: Escalante Petrified Forest State Park, Anasazi State Park Museum, Hell's Backbone, Devils Garden

Wednesday, November 18, 2015

Travel Tip #30 - Check Your Car Emergency Kit Before Going on a Road Trip

     Everyone should have an emergency kit in their car. You never know when you might need it. Automobile accidents are the number one cause of death for many demographics. Some of those deaths might be prevented if the first respondents have the right supplies to take care of problems they encounter. Even if a situation isn't a case of life or death, a well-stocked emergency kit can help mitigate problems you encounter.
     When you go on a road trip, the chances of you needing an emergency kit go up for several reasons: 1) You are spending more time on the road; 2) You are less familiar with the streets, which makes you more prone to accidents; 3) There is a much higher chance that you will be in the middle of nowhere if something does happen.
     Cell phones sometimes give us the false sense of security, that if we break down, we can just call for help. If you've ever seen one of those cell phone commercials where they show all the places their network covers, you may have noticed that there are also large spots that they don't cover. Unfortunately, if your car breaks down in one of those dead spots, it is probably one of the areas where you really, really need assistance. Therefore, it pays to be prepared. Check you emergency kit to make sure it has everything you might need, and that the items inside aren't out of date.
     To help you consider what you might include in an emergency kit, here are some ideas: a first aid kit with bandages, gauze pads, antiseptic wipes, ointment, adhesive tape, aspirin, anti-itch cream and essential medications; small fire extinguisher, two or three reflective warning triangles, foam tire sealant, tire pressure gauge, jumper cables, automotive fuses, flashlight with extra batteries, gloves, duct tape, tow strap, multipurpose utility tool (such as a Swiss army knife), pliers, rain poncho, drinking water, nonperishable snacks, blanket, ice scraper, and trowel. Don't just make sure that your first aid kit contains the necessary items, make sure that nothing has expired. Also make sure you have a fully charged cell phone and a fully inflated spare tire.
     If you ever do get stranded somewhere, there are plenty of everyday things in your car that you can use to survive and get help. I once ran across an interesting blog that detailed how to use these items in case of a real emergency. I printed off a copy of the article and stashed it in my glove box so that I would have it if I ever needed it.
     So next time you get ready to hit the road, set aside some time to make sure that you are prepared. Good luck and be safe!

Saturday, November 14, 2015

Spotlight: Escalante - Spooky Gulch & Peek-A-Boo Gulch

Spotlight: Spooky Gulch and Peek-A-Boo Gulch are a pair of interesting slot canyons inside Grand Staircase-Escalante National Monument. The national monument is huge (1,880,461 acres) - larger than the entire state of Delaware. The monument was created in 1996 under the Antiquities Act.

Location: About 32 miles southeast of Escalante are two impressive slot canyons known as Spooky Gulch and Peek-A-Boo Gulch. To reach the canyons, take BLM200/Hole in the Rock Rd. (a few miles east of the city off of HWY 12) southeast for 26 miles. Take a slight left onto BLM252/Dry Fork Road. A few hundred yards later, it branches again. Stay left for another 1.6 miles to the trailhead at Dry Fork overlook parking lot. The drive to the overlook will take about 2 hours one way.

Cost: a tank of gas

Time: 6-8 hours round trip (including drive time to and from Escalante). Or you could camp in the Coyote Gulch area. The canyons themselves will take about 2 hours to explore.

Description: The Hole in the Rock Road is sometimes closed due to inclement weather. The road, which goes all the way down to Hole-in-the-Rock at the edge of Lake Powell, is a rough, washboard dirt road (with several potholes, sand traps and ruts) and may be closed due to inclement weather. A four-wheel-drive vehicles is recommended, but not required.
     From the Dry Fork overlook parking lot, a winding trail goes north down the slope into the sandy bottom of the Dry Fork creek bed. From there, you can head to either Dry Fork Narrows, Peek-A-Boo Gulch or Spooky Gulch. We combined Peek-A-Boo and Spooky gulches into a 3.5 mile loop hike, starting in Peek-A-Boo Gulch.

     To get to the entrance of Peek-A-Boo Gulch, turn right (east) and walk about 100 yards. The entrance to the gulch is a series of footholds up a 15+ foot rock wall. Smaller hikers may need a boost. The bench at the top has several small pools of stagnant water. There are several cool rock formations inside the canyon including a pair of natural bridges. As you continue deeper into the canyon, the walls will tighten until it becomes impossible to proceed. At this point, you climb up out of the canyon and along the crevice until you can drop back inside. The canyon ends in a sandy wash. From there, you can either go back the way you came, or head east for about ten minutes to Spooky Gulch.


     To reach Spooky Gulch, you can either enter the back side (via Peek-A-Boo Gulch), or enter the front side by continuing east along Dry Fork stream bed. Although the entrances are fairly wide, once inside the canyon walls quickly close in. The slot canyon winds through the colorful Navajo Sandstone, forcing visitors to twist and turn their bodies as they wend their way around protruding rock fins and climb over boulders that dot the Narrows, where visibility is limited to only a few feet ahead. The canyon floor can be either sandy or rocky, and may have small pools of water after a rain storm. Once arriving back to the canyon entrance, hikers can turn west and return to the parking area, or head east another thirty minutes to Brimstone Canyon.


Rating: 5 stars (out of 5)

Things You Should Know: - If there is any sign of rain, do not enter the canyons! The canyons were formed by flash floods, and if you are caught inside when a flash flood hits, you will have nowhere to go. As a flash flood survivor, I know just how dangerous a flash flood can be; so don't take any chances.
- If you are claustrophobic, this hike isn't for you. Spooky Gulch in particular gets really narrow (under 18 inches wide) in one section. I am six feet tall and under 200 lbs. I got through (but it was a tight squeeze).
- Make sure you bring plenty of water. Summer temperatures can get well over 100 degrees Fahrenheit, and even though it will be shady inside the canyons, you still need to drink plenty of water. Also, there will be little relief from the hot sun as you make the trudge through the sandy bottom of Dry Fork to and from the canyons.
seeking shade
- If you are a slot canyon enthusiast, there are many other slot canyons nearby. An experienced hiker could easily include Dry Fork Narrows and Brimstone Gulch into their hike for the day.

Nearby: Glen Canyon National Recreation Area, Hole-in-the-Rock, Escalante Petrified Forest State Park, Calf Creek Falls

Wednesday, November 11, 2015

Travel Tip #29 - Check out the SkyView Stargazing App

     If you are camping out, you might want to check out the SkyView Stargazing App. There are a couple of versions of this app - a basic edition (which is free), and a more detailed version available at a modest price.
     The app gives viewers a variety of details. On its most basic level, when you point your device at the ground, a compass appears. When you point it at a star, it tells the name of the star, what constellation it is in, the star's classification, how many light years it is from Earth, and its location on star charts. Major constellations show up as pictures showing how the ancients connected the dots to create a picture. If you tap on them, additional information about the constellation appears at the bottom. Other items that show up are the Hubble Telescope, the International Space Station, the moon and planets which also can be tapped for additional interesting facts, including their orbits (with the local time they will appear at certain points in the sky).
     One of the most interesting things about the app is that you can even use it on cloudy nights. You might not be able to see the stars or planets, but you can see where they should be in relation to each other. You can even "see through" the Earth and find out where the sun is currently located in relation to your current position, and at what time it will rise above the horizon.
     Although I'm still getting to know this app for myself, my daughter and I have enjoyed looking for constellations with it. If you or your kids have any interest in space, I recommend that you give it a try. It might create some great opportunities on a camping trip to explore and ponder the mysteries of the universe.

Saturday, November 7, 2015

Spotlight: Canyonlands NP - The Maze

Spotlight: If anything is along the Path Less Trodden is would be The Maze in Canyonlands National Park. Canyonlands National Park has three sections: Island in the Sky, Needles, and The Maze. There are no roads that cross either the Green River or the Colorado River within the park, so the three sections are isolated even from each other. It takes between 2-6 hours to drive from one section to another. The vast majority of park visitors visit either Island in the Sky or the Needles District. Less than 1% (2,000/year) of Canyonland visitors ever get to see The Maze.
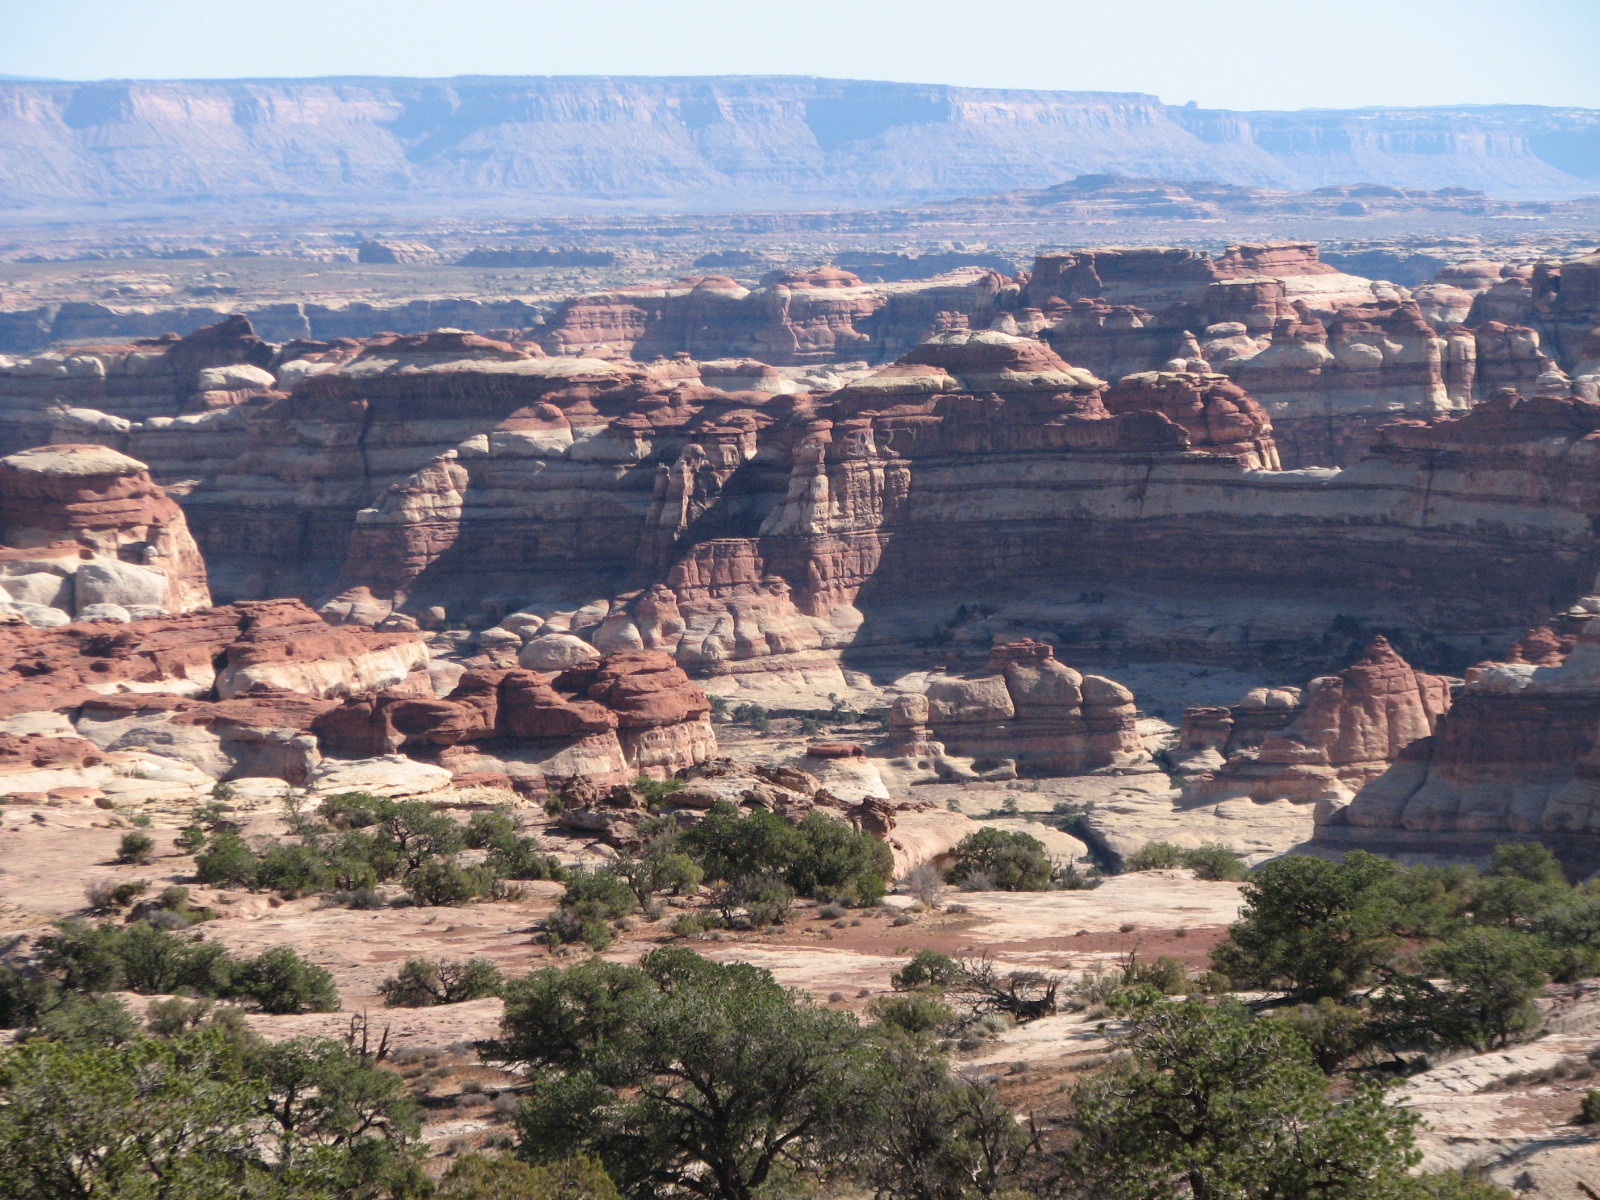
The Maze Overlook
Location: The Maze is definitely the most remote section of the park, and can only be accessed by 4-wheel drive vehicles. The closest "city" is Hanksville (more than 5 hours away) at the confluence of Highway 24 and Highway 95. For directions from Hanksville, click here.

Cost: No entrance fee, but backcountry permits are $30 per group.

Time: 3-14 days; Hans Flat Ranger Station is open from 8:00 am - 4:30 pm daily.

Description: I went to the Maze in mid-October with a couple of friends. Even though there were only three of us, we took two jeeps. That way, if one of the jeeps got stuck, we would have the other one available to help get it out or to go get help.

    To get to our campsite, we had to travel over miles of road that would have been difficult to navigate on foot, let alone a vehicle. One of the places we visited was called "The Neck." It was a narrow neck of land, about 20 yards across at its narrowest point, with big drop-offs on either side. We then drove down Flint Trail - a narrow, windy road with hairpin turns. If two vehicles encountered each other partway down, one would have to back up because there were very few spots where someone could pass. Of course, the chances of that happening were extremely remote since we didn't run into anyone else in our three days there.
Flint Trail down the bluff
      Our campsite was the Sunset campground. It was aptly named for the glow that lit up Sunset Butte every morning and evening. We calculated that we were the only humans within about a ten-mile radius of the butte. Once it got dark, stars started appearing by the hundreds. Since there was no moon that evening, and no other lights within dozens of miles, thousands of stars lit up the night sky. It was absolutely breathtaking! We saw several satellites and meteors as well as a phenomenon we'd never seen before. Along the horizon we watched some "jumping stars." I assume it was some sort of mirage, because we couldn't think of any other explanation for it.
Sunset Campground
     On Day 2, we drove out to the Doll House. The road was really rough near Teapot Rock, but the formations were totally awesome. Some of them included the Golden Stairs, The Wall, Lizard Rock and Chimney Rock. We named several others - a Jack-o-lantern, Jabba's Frog, and a Newsie Boy.
The Doll House
Jack-o-Lantern
Chimney Rock
Newsie Boy leaning against a building
     On Day 3, we drove out via Poison Spring Canyon Road. We had to hug the cliff because the road didn't have guardrails and the cliff dropped several hundred feet. The views, though, were spectacular. When we reached the canyon, we were treated to Aspen Trees decked out in their fall colors, contrasted against the deep red hue of the cliffs. We also crossed the Dirty Devil River. Once you commit, you have to keep going; because if you stop, you might get stuck. That kind of describes the whole trip. Was it worth it? You bet!
Poison Spring Canyon
Dirty Devil River
Rating: 5 stars (out of 5) - as long as you can handle not having a toilet

Things You Should Know: - There are no services, food, gas, or potable water sources at The Maze.
- Do not even attempt to go to The Maze without a high clearance 4-wheel drive vehicle. In fact, you should probably have two vehicles in case one gets stuck.
- When visiting in the Maze, or any other backcountry site, you must have a printed and signed permit in your possession during your entire trip. A permit is not valid from any mobile device. Backcountry permits can be reserved at canypermits.nps.gov up to four months before the start date of the permit, and can be picked up at the Hans Flat Ranger Station. They are good for up to 9 people and 3 vehicles, and can be issued for up to 14 consecutive nights (but not more than 3 nights at any one spot). Other backcountry regulations apply.
Hans Flat Ranger Station serves The Maze District. The station is 3-6 hours away from most locations within the maze, so visitors need to be prepared with the proper wilderness survival equipment for self-rescue. The phone number for the ranger station is (435) 259-2652, but there is little to no cell phone service in the backcountry. You might want to look into renting a satellite phone if you are going to be hiking in the Maze.
- Hiking within The Maze can be tricky for several reasons. Trails are primitive and are not well-marked. Also, many of the slot canyons look alike, so you can easily get lost. Also, slot canyons are prone to flash floods during inclement weather. Make sure you have both a detailed topographical map and a GPS, as well as a knowlege of how to use them.
- Special permits are needed for river trips or horseback riding.
- Temperatures can vary greatly (from -1 degrees Fahrenheit in January, to 116 F in July). On average, nights are between 20-30 degrees cooler than daytime temperatures. The most ideal weather is typically in the late spring or early autumn.
- For a list of authorized tour groups within the park, click here.

Nearby: Cataract Canyon (Colorado River), Goblin Valley SP, Horseshoe Canyon, Glen Canyon Nat'l Recreation Area

Wednesday, November 4, 2015

Top 10 - Tourist Destinations in NYC

     To finish off our New York/New England trip series, I've decided to do another Top Ten - tourist destinations in New York City. Even though we were only there three days, we did almost a week's worth of things; yet there are so many things we would love to go back and do "some day." Naturally, I might have to modify this list after a future visit. Here is my current list of Top Ten tourist destinations in NYC:

10. Coney Island - The best thing about Coney Island is that it is very affordable. There is no entrance fee, so you don't have to feel like you have to spend all day there to get your money's worth. On the flip side, since you pay for each ride individually, you have to debate whether each individual ride is worth it.


9. Rockefeller Center - The thing I liked best about the Rockefeller Center was the view from the Top of the Rock. My biggest regret is that we couldn't be there during the Christmas season to see the famous tree, or try the ice skating rink.

8. American Museum of Natural History - Since we enjoyed the Movie Night at the Museum, the best part of the museum was searching for the items that were used in the movie. Unfortunately, several of the main exhibits/characters in the movie aren't in the museum.

7. Central Park - The best thing about Central Park is that it has something for everyone. It is so big, that no two visits will be the same. I only wish I had more time to explore it, because we only saw a small slice of the park.
Statue of Daniel Webster
6. The Empire State Building - The Empire State Building offers two spectacular views of New York City - the classic view from the observation deck, and the virtual reality view via the New York Skyride. The down side is the price; but that can be mitigated through various combo deals.

5. Clipper City - The nice thing about the Clipper City tour is that you get awesome views of the Statue of Liberty and the NYC skyline without the long lines. The downside of seeing the Statue of Liberty this way is that you don't have the option of going inside the monument or visiting the displays.

4. The Intrepid Sea, Air & Space Museum - The Intrepid lets you explore an aircraft carrier and a submarine, as well as admire a wide variety of 20th Century aircraft including a space shuttle - all in one place. The downside is that you can only admire the fighter planes from a distance.

3. Times Square - The great thing about Times Square is the easy access to a wide range of famous stores and restaurants; and it doesn't cost anything to browse. On the downside, if you do purchase something, it's going to cost more than if you buy it elsewhere.
Rocky & Pop at Planet Hollywood
2. Broadway - Broadway plays host to the most famous dramas from around the world. They are performed in some of the most famous venues in the nation, by some of the most talented actors. That being said, I'm sure you've heard the expression "You get what you pay for." In other words, those high demand tickets are going to cost you a bundle.

1. Liberty Island - The Statue of Liberty is probably the most famous statue in the world. It symbolizes all the values our nation was built on. Climbing to the crown of the statue is one of the most enduring memories I have of my youth. The only downside of visiting Liberty Island is the long line to get on the ferry.
Waiting in line to get on the ferry