Location: The trail head is located up Mapleton Canyon. Drive east on 400 N until you reach Whitings campground. The sign says it is a fee area, but that is for the campground. Keep going up that road until you pass the campground and park in the parking lot at the end of the road. Start hiking up the Left Fork Maple Canyon Trail for about a quarter mile until you reach the trail head. At this point, the trail you've been following keeps going, but you will cross the stream over a small wooden bridge at the following GPS coordinates: 40.135327, -111.523185
Time: 6-10 hours. My friend and I, who are experienced hikers, did it in just under 8 hours with about a 20 minute break at the top.
Cost: The only cost is physical.
Description: The trail is officially listed at 10.25 miles round trip, but if you count the quarter mile hike to reach the trail head, it is closer to 11 miles. It is a strenuous hike, along a steep trail, particularly the last mile to the top. It is a great workout for experienced hikers, but I wouldn't recommend it for novice hikers.
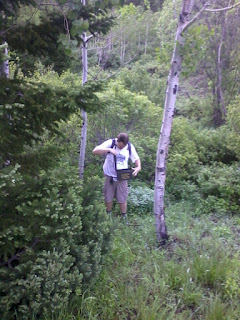
The first part of the trail isn't very steep, but it is rocky. Soon after crossing the stream, the trail gets steeper as you steadily climb up through the very lush, green foliage that lines the trail. Although the trail is very distinct, it is not very well maintained. Branches from bushes on either side of the trail often hang over the trail, and several trees have fallen over the trail at various points. We went in mid-June, and started at about 6 am, so our pants got soaked on the way up from walking through the dew-laden branches. Although most of this area is forested, you will intermittently cross through meadows, some of which may contain the occasional camper.
Eventually, the trail levels out on a plateau that contains several larger meadows, including the one containing Maple Canyon Lake. The "lake" is more of a pond, and is infested with mosquitoes during the summer months.
Shortly after passing the lake, the trail gets really steep as you press on to the summit. Depending on the time of year, you will encounter snow patches that cover the trail at several points. We had to traverse a large snow field in the bowl that leads up to the saddle, which slowed our progress immensely going up, but made it faster coming down.
Once you reach the ridgeline, you can see Utah Valley below you. To reach the summit, turn left. From there, the trail will split again. The main trail traverses the western face up the mountain before joining the ridge trail again. It makes a more gradual ascent to the top, but might be covered in snow. Since we encountered a lot of snow, we decided to follow the less obvious ridge trail to the top. It is a little steeper, and makes you lose some of your elevation before climbing again, but was faster since we didn't have to walk across the snow.
Once you reach the summit, you will find a large rock cairn that contains a mailbox. There used to be a summit log inside it, but someone ripped out the pages. In any case, it offered beautiful views of the entire valley on both sides of the mountain.
 |
| View of Mt. Nebo |
 |
| View of Utah Lake |
Rating: 3 stars (out of 5)
Things You Should Know: - The trail crosses a seasonal creek at one section, so you may get your feet wet. My shoes were soaked from the underbrush even though I was able to cross the creek on rocks.
- If you like geocaching, there are several geocaches along the trail. Some are easy to find, other are a bit more difficult.
- Depending on the time of year, some of the meadows may be filled with beautiful wildflowers.
- You will probably be sore the day after going on this hike, so plan accordingly.
- Recommended items for this hike are: good hiking shoes, sun block, bug spray, a walking stick, snacks, and plenty of water for each hiker.
- Water from the lake must be purified.
Nearby: Mount Timpanogos, Santaquin Peak, BYU, Diamond Fork Canyon.


No comments:
Post a Comment